Sunday 8 April 2012

Bow Quiver Project: With Documentation

A Bow Quiver in Leather


Rashid al-Qasim
Tir Righ A&S Championship Competition
October 22, 2011
Single Item Entry 

Introduction

During the 12th century, Crusaders fought with very professional, highly mobile soldiers of Turkish and Arab descent. Members of the military caste during the Ayyubid Sultanate period of Egypt (1171–1341 CE) were expected to maintain and acquire their own basic gear such as swords, armour, bows, and spears. However, as they rose in station they were given elaborate and decorated equipment such as scabbards, belts and robes only as their rank required. The bow quiver was likely among these items that could be gifted to worthy subordinates by their superiors.

This project is my attempt to present a reasonable period example of a period bow quiver, inlaid with brass, carved leather, and some semi-precious stones. It is designed to fit my personal Tatar style recurve bow based on illuminated manuscript images from my persona's period (12th century) and later.

This item is one of my first pieces of leather work and something that I wanted to undertake to expand on my period archery equipment.

History of the Bow Quiver

Much like the sword's scabbard, the bow quiver (or bow case), was a vital piece of equipment for a military elite of cavalry. It kept the bow dry and clean, it kept it at hand when needed and out of the way when other weapons were drawn. It was part of the kit of the average Turkic soldier or Mamluk of the 12th-13th Century amongst the military Sultanates of the Ayyubids and Mamluks, along with decorative belts, robes, and scabbards. As a soldier rose in rank, his pay increased and thus could afford more elaborate and decorative equipment, but could be publicly rebuked for wearing decoration above his social station1.

While surviving artifacts are few, there are many examples of bow quivers being worn by the subjects of several illuminations from as early as the 13th century (eg. Figure 1).


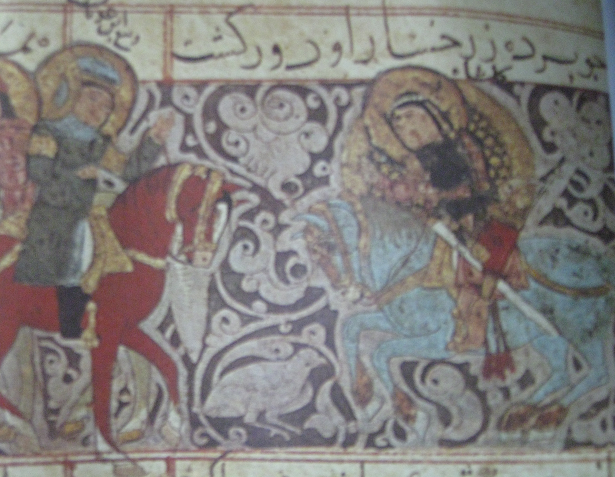
Figure 1: “Guslshah arrives to remove her veil”(Nicholle and Nicholson page 22). The soldier on the blue horse is wearing a red bow quiver along with his sword.

Representations of the bow quiver appear much more frequently in later Persian and Mamluk art such as Riza-i Musawwir's: Rustam Battles With The Monster (1642-1651) which displays the hero Rustam fighting an enormous beast with his bow drawn and an elaborate case for it at his hip2. Examples of bows being carried at the hip appear elsewhere in the medieval world, from the lands of Volga Bulgars to as far away as Mongolia and Tibet3. Even today, modern traditional archers in Korea and Turkey wear bow quivers along with traditional clothing, hats, and shoes.


All examples of the bow quiver are designed to fit the curved composite horse bows of various cultures, from the short high-powered Turkish flight bows to the long Chinese and Mongolian war bows meant to cast heavier arrows4. The characteristic reflex design of the bow allows it to 'store' more energy than a similar straight bow of the same size Since the string is under much higher tension, it casts the arrow farther.5 Thus the bow quiver must be built to accommodate that shape
The bow quiver could be plain or ornamented leather, and an illustration of Persian hunting (Figure 2) hint at elaborate brass work on the blue quiver of one of the hunters. It almost universally appears to be worn on the left side of the archer, with a quiver of arrows on the right. Since most archers are right handed, they hold their bow in their left hand and draw the arrow with their right, it would stand to reason that they would want to easily draw both bow and arrows from their quivers with the hand that would hold them.
Figure 2: A Safavid manuscript from the middle of the 16th Century, Alexander the Great hunting on his way to China, Walters Art Museum Ms. W.610, fol. 295b 
 
Stage 1: Leather Work

The first thing that had to be done was trace my strung bow over a piece of whole hide, so that I could achieve a satisfactory case and seal for the strung bow. I then cut it out with a sharp knife, moistened the leather and folded it in half so it would keep its shape. This process was of my own devising, given what I knew about leather at the time.

Since my bow was wide and flat in the limb, it required a gusset of leather to be sewn into the void along the top. I bought a long strip of leather and used it to run along the top of the bow quiver, leaving the string against the curve in the leather (Figure 3). This is ideal, as if I had stitched the bottom of the quiver and left the fold at the top, the string would constantly rub against the lacing (which could cause fraying of the string over time), and the fold would not have allowed for as secure a grip for the bow.

Figure 3: Leather cut to shape for the bow it will hold.

This would be a major setback in the construction of the bow quiver, as it required careful punching and lacing of a gusset which was quite time consuming. But ultimately, the bow fit the leather casing comfortably, without too much forcing or rubbing of the string. It should be noted that the lacing and installing of the gusset strip did not happen until near the end of the construction, to allow access to the inside of the quiver for attaching the hardware.

Stage 2: Islamic Script

The leather inscription was a bit of a lucky accident. It was an old piece of leather of an odd shape I had laying around. I had previously looked at some Islamic script and was thinking of putting it into a leather working project such as a bracer. But late one night I got it in my head to try it out. I searched online for some suitable calligraphy and came across the works of Hamid Ayac, a Turkish calligrapher from the 20th Century. Although his work is modern, it is both striking and influenced by late period Ottoman. This particular piece is a fragment of his illumination of Abu Hurairah's 13th Hadith. The full Hadith reads as follows:

"When God decreed the Creation He pledged Himself by writing in His book which is laid down with Him: My mercy prevails over My wrath."

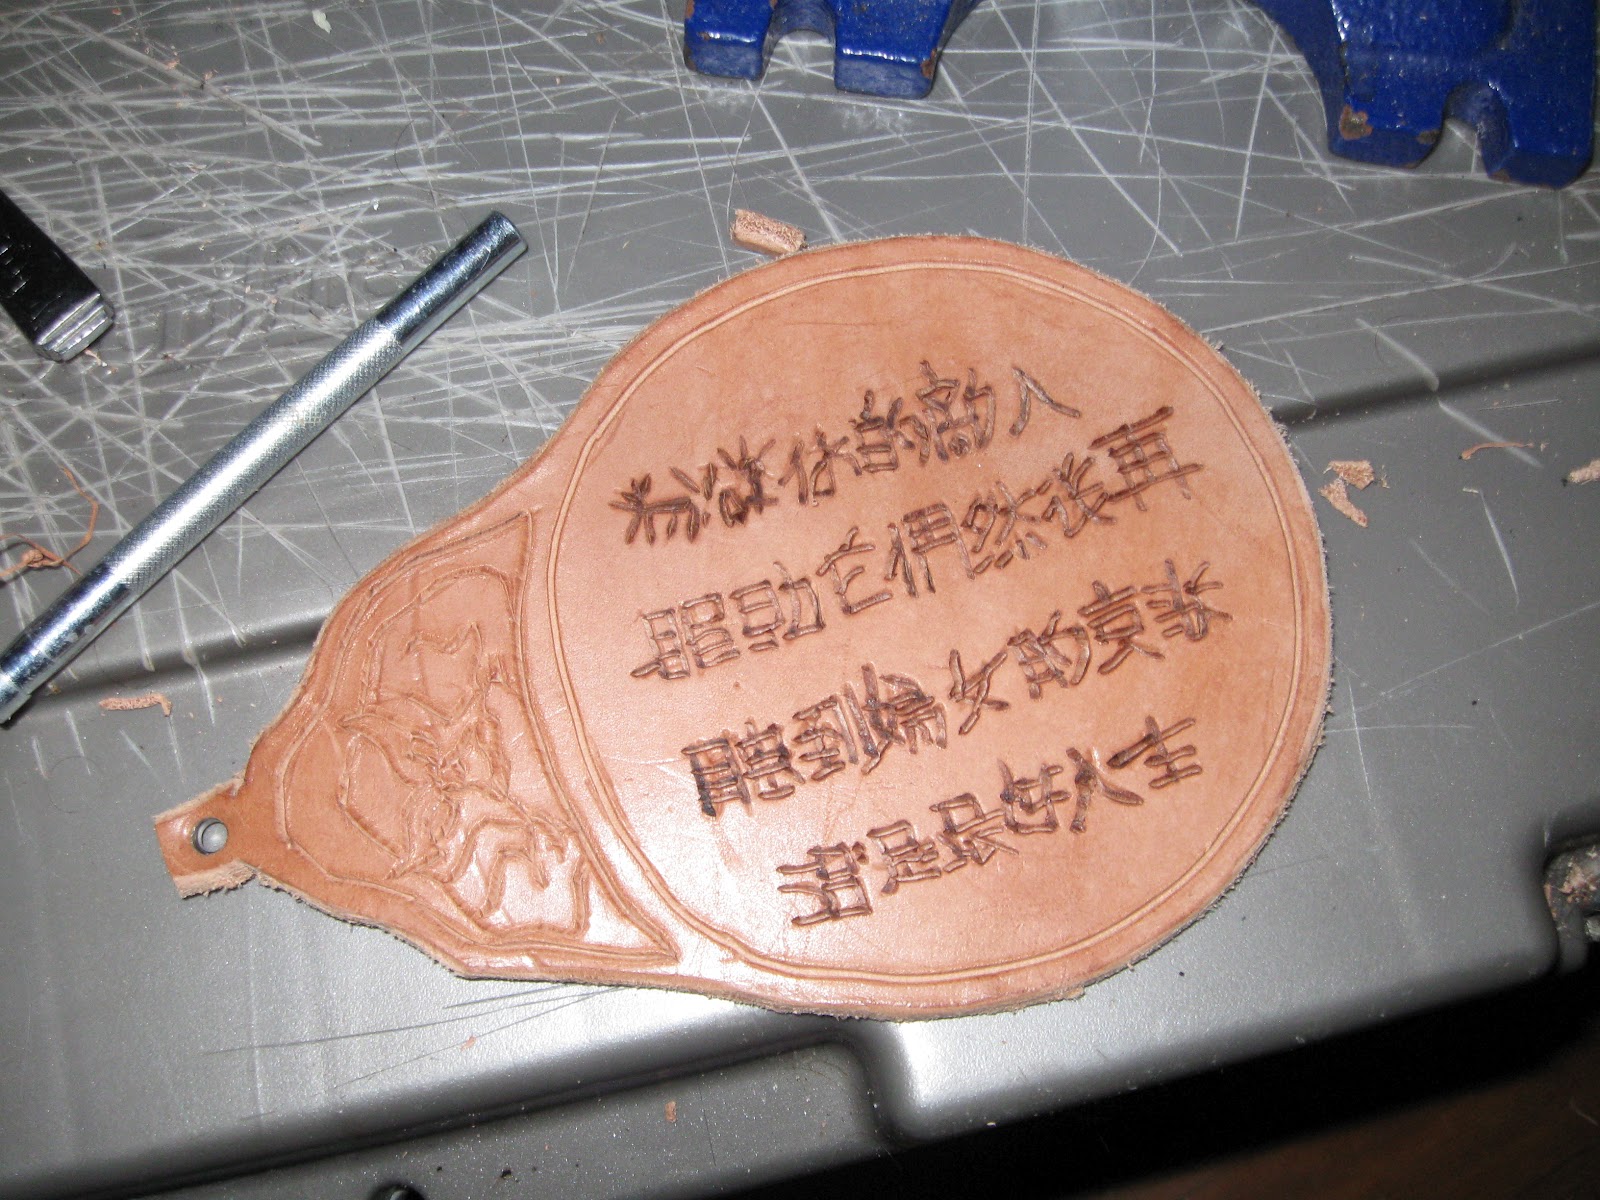
I printed off a re-sized picture of the illumination, then placed it over the oddly sized piece of scrap leather I had laying around. I damped the leather slightly with water, then took an empty ballpoint pen and traced the lines of the calligraphy over the paper so it indented into the leather (Figure 4)

Figure 4: The calligraphy traced into the leather

The next step was to take my Exacto knife and carve along the lines to leather a groove. This was time consuming and perhaps not the best tool for the job, but I did not own a swivel knife at this point. I then took a bevel stamp and mallet and began the process of stamping down the leather around the cuts to create a raised look to the script.
Stage 3: Brass Work

First it must be stated that the brass work was not done by me. It was accomplished by a person in my Barony named of Pan Krystoff Sirtastki, or Sirt. Although he has expressed to me the ease with which I could duplicate the brass work, I have chosen to leave it in place in it's original form out of respect for his craftsmanship. The story of how it appears on this project is as follows:

So I asked Sirt if he could add a little 'bling' to my bow quiver, as I wanted to have it fancied up for Daffodil (an annual tournament in our branch). I asked him for a few pieces of simple brass fittings, since he does good work with brass on rapier equipment. He pondered a little then asked if I had given any thought to what I'd like carved into the brass work? Perhaps a crescent moon? I agreed hesitantly, after he assured me it wouldn't be much trouble. He then asked if I wanted a scalloped pattern as well, as this would be appropriate, simple, and hide any irregularities in the angles of the brass. I nodded, thinking this was also a good point. Finally, he asked me how I felt about semi-precious stones such as tiger's eye, to which I blanched, rubbed my head and resigned to letting the Lithuanian run a little mad with my simple request.

The pieces were laid out by Sirt under my direction. I wanted them to look as akin to the primary source as possible, while allowing for his artistic embellishment (of which he has a great deal). He had a look through some books on Islamic art, but in particular the work of Cherrie Ann Button, who has worked with museums making replica articles of clothing6. He also took inspiration from Persian brass work portraying flowers, and of course the ubiquitous crescent moon of Islam. While this symbol (called the Hilal) was not as common in general Islam as the Crucifix was for Christianity in period, we felt it tied the quiver nicely to the image of something an Arab soldier would wear.

The pieces were first cut out in cardboard and laid out on the unfinished bow quiver (Figure 5). Once we were happy with how they looked and were placed, Sirt cut the pieces out of brass while I worked on cleaning up the edges of the leather and attaching the straps to which it would hang from my belt. He polished and filed and scraped the brass into designs using his own tools. The tiger's eye stones were flattened on one side and set in the brass sockets in the top piece and centre circle piece. The scalloped brass end piece did a good job of closing the end of the bow quiver when it was riveted in.

Figure 5: The brass work templates laid out on the bow quiver, along with the Islamic script and belt straps

Stage 4: Finishing Touches

After the brass work was riveted on, I punched holes in the leather script and tied it to the quiver with leather lace knots. I felt that adding brass rivets to this part would clash too harshly with the overall leather appearance of this part of the quiver. The two leather straps were riveted to the back of the quiver then brass buckles bought from the local leather shop were added. I made another strip of leather, looped it and punched holes in it like a belt. (Figure 6) This would allow me to adjust how the bow quiver hung off my belt, and hopefully keep the bow from knocking against my legs as I walked.

Figure 6: Belt loop and buckle

One of the last things to be done was lace up the quiver and the gusset. Taking a stitch marking tool, I made a series of light indentations along both edges of the quiver body and the top gusset (Figure 7). I then went along with a leather punch and put a hole in the leather at every 2nd marking. Then, placing the gusset along the quiver body (and cutting it to shape towards the end), I began lacing it with leather lace in a straight lacing pattern, first down one side to the bottom then up the other.

Figure 7: Pattern for the hole punch


A late addition to the design of the bow quiver was some fake wolf fur. This was procured from Sirt, who just had it laying around from an older project. I have no evidence of this being used in period, but myself and Sirt felt it would go very nicely as a 'bow cozy' along the inside top of the bow quiver, giving it a little more cushion (Figure 8). Since the brass was already riveted along the top, I felt it was better to use modern glue to hold the fur in place. I applied a little carpenter's glue to the back of the fur, then pressed it to the inside of the quiver. I took a few old hardcover books, wrapped them in plastic, and stuffed them into the top of the quiver to add some pressure to the glue as it dried.


Figure 8: The wolf skin laid out before the quiver was laced up

Lastly, I applied two coats of commercially available brown leather dye to the overall surface of the leather. In period, I believe the leather would have been dyed with a mixture of walnut dyes and iron dyes, but not as readily available. The reason I dyed it so late was because I originally intended to leave the leather natural. But looking at the brass placed on top of the very average skin tone, it didn't really grab the attention I wanted it to. By giving it a darker hue, the brass stands out and it matches the darker semi-precious tiger's eye as well.

Conclusions

This was a project that I've wanted to do since I first got into archery and developed a persona around archery. Making a bow quiver was a chance to experiment with new leather working techniques and the end product gives me something which allows me to display my bow in the fashion other lords would proudly carry a favourite sword. I was very grateful that Sirt was able to assist with the brass working, as I feel that really makes it an eye-catching piece.

There are three things I would do differently next time. One, I find that the bow quiver, even when hiked up to the highest notch on the loop, hangs a bit low and sometimes bangs on my legs as I walk, but that is a simple matter of making new straps. Two, I'd like to get some better tools for applying leather dye, as I felt the smaller brushes and swabs I had left a bit of a swirly pattern that shows up in the light. I do like the organic look, but it feels a little messy in a harsh fluorescent light. And lastly, I'd like to replace the Islamic inscription one day with a replica of something period, or learn Arabic calligraphy enough to free-style something myself.


Sources
  • Loukonine V. and Ivanov, A. 2003, Persian Lost Treasures, Sirocco Publishing, Dover, DE
  • Nicolle, D. & Nicholson H. 2005, God's Warriors: Knights Templar, Saracens and the Battle for Jerusalem, Osprey Publishing, New York, N.Y
  • Nicolle, D, 1999, Arms and Armour of the Crusading Period 1050-1350: Islam, Eastern Europe and Asia, Green Hill Books, London
  • Hamm, J (editor) 2000, Traditional Bowyer's Bible Volume 2, The Lyons Press, Guilford, CT
  • Walters Art Museum Illuminated Manuscripts, Viewed 19 October, 2011 <http://www.flickr.com/photos/medmss/>
  • Asian Traditional Archery Network, Viewed January, 2011 <http://www.atarn.org/>
1 - Nicolle, D. & Nicholson H. 2005, God's Warriors: Knights Templar, Saracens and the Battle for Jerusalem, Page 130
2 - Loukonine V. and Ivanov, A. 1996, Persian Lost Treasures, Page 191
3 - Nicolle 1999, Arms and Armour of the Crusading Period, Pages 317 and 242
4 - Hamm, J. 2000, Traditional Bowyer's Bible Volume 2, Page 120
5 - ibid., page 167.
6 - Asian Traditional Archery Research Network (ATARN), Letter of November, 2003

Wednesday 4 April 2012

A fun project: Mongolian Passport in Leather

The original artifact, cast in bronze and way awesome

Although used by the Chinese in earlier centuries, it wasn't until the Mongolian Yuan dynasty that examples of this kind of passport became commonplace. This tablet of authority allowed the bearer access to civilian and government goods such as rations and fresh mounts at relay stations across the empire, allowing government officials to travel vast distances quickly with little delay.

Referred to as a Paiza (plural: Paizi), these iron or bronze medallions were worn around the neck or attached to an item of clothing and presented to customs officials. The bearer was entitled to a great deal of benefits including exemption from road taxes. This led to several abuses of the passport over the years, and many Khans would harshly regulate or remove the power of the Paiza bearers.

The original example is iron with silver inlay. The script is Phagspa, a written language developed by Tibetan monks for the Mongolian empire. It reads:

By the strength of Eternal Heaven,
an edict of the Emperor [Khan].
He who has no respect shall be guilty.

Source: The Metropolitan Museum of Art

8.5x11 = Best first draft ever.

The reproduction has been crafted from thick 8 ounce leather, measured to the same size as the one in the 'Met. After cutting out the leather, the edges were rounded and cleaned then the design was traced into the leather through a piece of paper with the same design as the original artifact.

The script, while not Phagspa, is classical Chinese which has been in use since the 5th century CE. A phrase was chosen, then put through an online translation to give a rough idea of what it would look like in Chinese. The phrase was a famous quote attributed to Temujin, known as Ghengis Khan regarding what he felt to be best in life.

One day in the pavilion at Karakorum he [Genghis Kahn] asked an officer of the Mongol guard what, in all the world, could bring the greatest happiness.
"The open steppe, a clear day, and a swift horse under you," responded the officer after a little thought, "and a falcon on your wrist to start up hares."
"Nay," responded the Kahn, "“The greatest happiness is to scatter your enemy, to drive him before you, to see his cities reduced to ashes, to see those who love him shrouded in tears, and to gather into your bosom his wives and daughters.”
Source: Harlod Lamb in the biography, Genghis Khan: Emperor of all Men (1927)
Or, to put it in the more common phrasing:

“To crush your enemies, see them driven before you, and to hear the lamentations of their women.”
Source: Conan the Barbarian, film (1982)
The script was also traced from the paper onto the leather, then burned with a wood burning tool to make it stand out against the leather.

This is the one I made. I realized later the writing may be on a slant...

The design at the top of the paiza is styled after a lion in the Indian fashion of the time. This was also traced from paper onto the leather then the lines were cut using a swivel knife and the area around the lion was stamped down to raise the desired portion and give it more definition.

The chain it is attached to is a copper chain using a 'box weave' pattern, similar to the decorative Byzantine style. The chain is bound at the back of the neck with an S-hook. The design, alas, does not have documentation but provides the weighty leather passport with something to support it as either a decoration on the wall or around the wearer's neck. The copper colour works well with the natural colour of the leather, and does not conflict with SCA sumptuary laws by appearing to be too gold (even though it is 'adorned' with the Paiza, it was felt to be better safe than sorry!)

The viking does good work...

So why did I do all this, you ask? Well it was a gift for our Baron Ming when he stepped down. Me and Aelfgar were sitting around playing Uncharted II: Among Thieves and one of the bonus treasure items was a Mongolian Passport. We got this crazy idea in our head that Ming, as our awesome Mongolian Baron, needed to own one. Since neither of us knew how to cast bronze or engrave in silver, we settled on leather and copper chain. The end result was very well received by His Excellency, as it was a cross between something period and something Flava-Flav. Pictures of him wearing it to follow!

Special thanks to Sir Ogedei Bahadur for his consultation on this project. One day I'll do it in bronze, I promise!

Sunday 2 October 2011

Islamic Embroidery

While searching for examples on medieval Islamic embroidery, I stumbled on this wonderful website!

http://home.comcast.net/~mathilde/embroidery/gallery/islgall.htm

Gonna teach myself how to do this for the Tir Righ A&S championship. Why? Look at it! How awesome is that!?

Tuesday 6 September 2011

New Book

Well, I'm over the moon. My Laurel (who's brain I so dearly love to pick), Æringunnr picked up a copy of 'Arab Dress From the Dawn of Islam to Modern Times' at Crown Tournament this last weekend. I've only just begun looking through it, but right now I can tell you this is the book I've been looking to find for years now. There is a staggering amount of information, well documented and laid out for someone like me. I was particularly interested in the section on Ayyubid/Mamluk era clothing as it gives a concise and detailed essay on the Turkification of Arab dress at this time.

Oh boy, I'm already planning new garb!

Tuesday 9 August 2011

Archery Bracer #4 for Artemis

This next bracer is for my lovely girlfriend who goes by Artemis in the SCA. The lovely lass cooked up an entire set of Turkish garb for her second event. Her first event she wore medieval garb that she just happened to have 'laying around'. You can see why I'm so fond of her.

So first things first: To find out if she even likes archery! Luckily, Tournament of Armies was just around the corner and Artemis was coming with me. Well, she was sorta the wheels of the operation, so I guess I was going with her. Anyway the night before I wanted to cook her up a bracer for shooting 'cause, ya know, that's what I do.

De Ja Vu: The feeling that all of this has happened before...
I should mention this bracer actually started before Thorun's, but I finished it after. You'll see in a little while. Anyway I cut out a quicky bracer from some leather, not really even sized for her but it came out pretty good. I added a little beveled border around it, just for some flash.

This is the part that keeps it on her arm!
So this is what she took with her to TOA. Basic, but personal. She shot quite well on my old green-stringed bow (named Petunia), after some practice she was hitting the paper with all six arrows at 20 yards. She's a natural, and I aint just saying that 'cause I know she'll read this later.

Ok so TOA is finished. We head home, and I crash for 48 hours. I had been to an event every weekend for a month. Remind me never to become Royalty, because that gig must suck for wanting time to yourself. Anyway I get home, I decide to get back into the leatherworking again. So I tool up Thorun's bracer (as seen in the previous post), then set to work on my lady's.

I talked with her a bit, and she is really into the idea of falconry. I must take her to an event where they have some demonstrations of these birds. But in the meantime we talked about heraldry and things to put on the bracer. Her name, a badge or device she might want to register or even just a heraldric charge. I suggested (like an idiot) that a falcon would look really cool. She agreed.

Birds... why did it have to be birds...
As you may recall after Isabella's bracer, I swore no more birds. But then again I swear a helluva lot, don't I? The feathers are tricky, a lot of sharp points that I'm not used to doing with leather. Give me rounded edges any day! But this heraldric falcon was a LOT easier. Far more straight, clean lines. Also, I suggested maybe adding something in Arabic at the bottom, again because I am a chump. She thought that would be awesome so I went looking online for something Arabic to do with archery and found this from the Hadith of Sahih Muslim, Book 20, number 4711:

It has been narrated on the authority of Ibn Amir who said: I heard the Messenger of Allah (may peace be upon him) say - and he was delivering a sermon from the pulpit: Prepare to meet them with as much strength as you can afford. Strength is in archery, strength is in archery, strength is in archery.

So I decided to put "Strength is in archery" through a Google translator and it spat out a reasonable looking piece of Arabic script. I copy/pasted it into Photoshop, arranged the heraldric falcon and the script then sized it using measurements I took from the bracer. My friend Alex was kind enough to print it off for me, then it was time for tracing!

De Ja Vu: The feeling that... OH GOD! THE AGENTS ARE HERE!
Wetting the leather and taking a (nearly) empty ballpoint pen left quite an impression. It looked gorgeous when transfered onto the leather! I really shoulda grabbed a picture of that, but by then my lady had showed up at my house and insisted on watching me work.

She even took the camera from me!
I traced over the edges with the swivel knife and carved out the eye with my stitching groover. The arabic script was a pain, but I eventually settled on the idea of using the grooving tool again to carve off the leather of the script. It was difficult work, and probably not the best tool for it but it gave the lines some definition that they wouldn't otherwise have.

Much easier to read now, eh?


After that, I took the bevel stamp to around the edges of the falcon. It wasn't as hard as I thought, as I've had a bit more practice. I also took the bevel stamp to the outside of the wing, to make it seem raised against the body. Then I took a very small texture stamp and stamped some texture into the feathers, the talons and the beak. It worked very, very well.

Pretty darn spiffy, wouldn't you say?


I learned a lot on this project. One of the most important things was not to get the leather too wet. I wetted it down a few times, but I wanted to remove some of the tooling marks from it so I drenched it in water. Problem was, this also removed some of my tooling with (or made it kinda indistinct), so I had to go back over it again. Not a horrific mistake, but one I won't make again.

Another issue was with the Arabic script. I was really struggling with a way for it to stand out besides just a series of cuts in the leather. I tried a bit of bevel stamping, but it looked not so good. I like the effect the grooving tool made, though and I might do that again in the future.

After I was finished, I decided to do something really silly. I've been finding that the leather lace I use cuts into the bracer a tad over time, grinding away on it a little bit. Nothing too severe, but I think for my really nice work I'll use gromets. Low and behold, I happened to have some laying around.

That'll hold it!


So there it is, a new archery bracer for my lady Artemis. I am most proud of this one, not just because of the work or how it turned out. I'm most proud that I got to do something awesome and unique for the lady I care so much about.

Enjoy, Habbibi!

Monday 8 August 2011

Archery Bracer #3 for Thorun

 Earlier this year I sold the first bow I ever owned to my friend, Thorun. I wasn't shooting with it anymore, she wanted something to shoot with... so it all worked out! I sold her the bow, the case and a stringer for a decent price. But as any true salesman will tell you, it's all about the add-ons. So I offered to make her a custom leather bracer as well. Five months later (never said salesmen were prompt), this is what I came up with!

This bracer was a bit different from the others, I used a thinner grade of leather for this one, and it had an interesting effect. The tooling required almost no effort at all, and it left some very nice impressions. It is a big more wiggly than the typical stiff bracers I'm used to, but I think this also means there is less chance, as time goes on, of the leather drying out and cracking. Plus it has a really nice texture.

I went through the usual steps for cutting out the bracer and rounded off the edges. After wetting the leather (as always), I cut the holes out for the lacing, beveled the edges, then took a stitching groover and created a line running about an inch and a half around the edge of the bracer.

Taking one of my stamps and a mallet (not a hammer, too heavy), I placed the leather on an anvil and gave the stamp two whacks just beside the groove I cut. This was more than enough to leave an impression. I traced the line with the stamp to create a very nice border effect. Then I grooved out another line along the edge of the stamping. Voila! Instant fancy border!

I wanted to try something a little new for this bracer. After speaking with Thorun, I decided to put her name in Norse runes on it. The website I used to translate her Norse name into runes can be found here.

I traced the runes onto a piece of paper, then traced it onto the bracer using the empty pen method. Taking the swivel knife to the smaller rune lines was a bit tricky, but the bevelled stamp I used really made it pop. I gave it a coating of water sealer and tied it up using leather lace.

For those keeping count, the TH is one letter.

Overall, I was happy with the result. In the future if I put script on a bracer, I'll use a larger font (I did use a pretty big font already) to give me some wiggle room with the knife and stamp, and some of the lines are a tad uneven. But I really like the border effect and I'm quite proud to give my friend something unique she can shoot with for years. The fact that she's giving me a little cash doesn't hurt either!


Thursday 4 August 2011

A Tournament of Armies

Ok so as some of you may know, last year I went to Tournament of Armies 1 in Lions Gate, An Tir. It was a bit rocky, some major delays and schedule changes. There was a lot of very cool ideas being implemented, such as a warband processional in which all the armies came into court and presented a bit of propaganda for their side. Nice idea, but it took quite a while and it was less than comfortable waiting around in that armour. The idea that A&S and service added to your Warlord's warchest was also great, but alas the economy became a bit inflated due to all the volunteering.

This year, none of those were issues.

Despite the fact that the event venue had been changed at the last minute (flooding and mosquito infestation of the original site), the entire thing went over very smoothly. Well, less smoothly for me and my lady Artemis, since we got lost a time or two on the way and when we got there, we found that our tent had the wrong polls. No worries though, Johanna gave us the use of her tent for the weekend, to which we responded by gifting her with Turkish delight (the candy, not a swarthy man from Istambul) and Belgian and Insula Magna beer.

Court was very quick, lots of banners and pomp for all the warlords. Right after that we basicly jumped right into war mode. There were a lot of people there, easily twice as many as last year. A great deal of fighters as well were present, and a solid force of Rapier mercenaries. It was starting to feel like a big event.

I pledged my services to Baroness Margaret of Lions Gate as an archer to gain her army boons. I even submitted my bow quiver into the A&S competition to give her some more coins, and was drawn into judging a research paper as well. Despite not having any documentation (except what I gave for an oral presentation), I scored pretty decently. I'll put some of the feedback up in the blog when I get around to posting about the project in question.

After that it was archery. The set-up took quite a while, and it was damn hot on that field. Lady Jaqualine, who was MIC, did an amazing job of providing us with shade, water, and a lot of fun shoots. I shot myself a king-sized rabbit, shot two arrows through a cross-shaped loop hole and one arrow through an inch-wide 'Assasins Slot' in a castle wall. I was one of only 3 archers to make that shot (One was a Gray Goose, the other was just a really good archer!). We even had enough space for a Clout Shoot (the kind where you have to aim your bow 45 degrees up to hit a target 100 yards away). Our group of archers earned many boons and points for the Baroness' army, and it was an absolute pleasure to be on the line with the fantastic archers from Lions Gate.

The evenings were... well... The first night the Drakkar's invited me to drum with them. I only had my little thing that I picked up at San Fransisco (the store, not the city) and scraped off the painted pot leaf, but they were incredibly encouraging and gave me hope for my white-man rythem syndrome, AND my lady even got up and danced a little in her new Turkish garb. I also drank nearly all the wine and most of the beer we brought.

The second night I got to sit back and enjoy the sound of my favorite instrument in the world: The Saz, as played by Shareef Musiqi al-Rashid. If you haven't heard one, youtube it. There was also much dancing, coin tossing, singing of drinking songs, and one awkward moment when Tiampo was feeling me up.

The following Sunday was my favorite moment of the weekend. I got to teach my lady Artemis how to shoot a bow. I even made her up a bracer from some leather the night before. I don't mean to brag, but she got pretty darn good with that bow. By the end, she wasn't missing the target once at 20 yards. I was very proud and thrilled that she was enjoying it so much.

We packed up a little early and left site before 2pm on Sunday. After saying goodbye to all our new friends and old, we got lost on the highway back to the ferry. Not to worry, we made it out and caught the 5pm ferry with no difficulty. Artemis was lamenting that the weekend was over so soon, and I could definatly relate. I highly encourage everyone reading this to go next year to Tournament of Armies.